How to : WorksFit
We’ve long felt that we needed to provide our users with an easier way to choose the correct handlebar for their application. Riders come in all shapes and sizes, each with their own personal needs and WorksFit™ will be an additional aid in determining the correct bar.
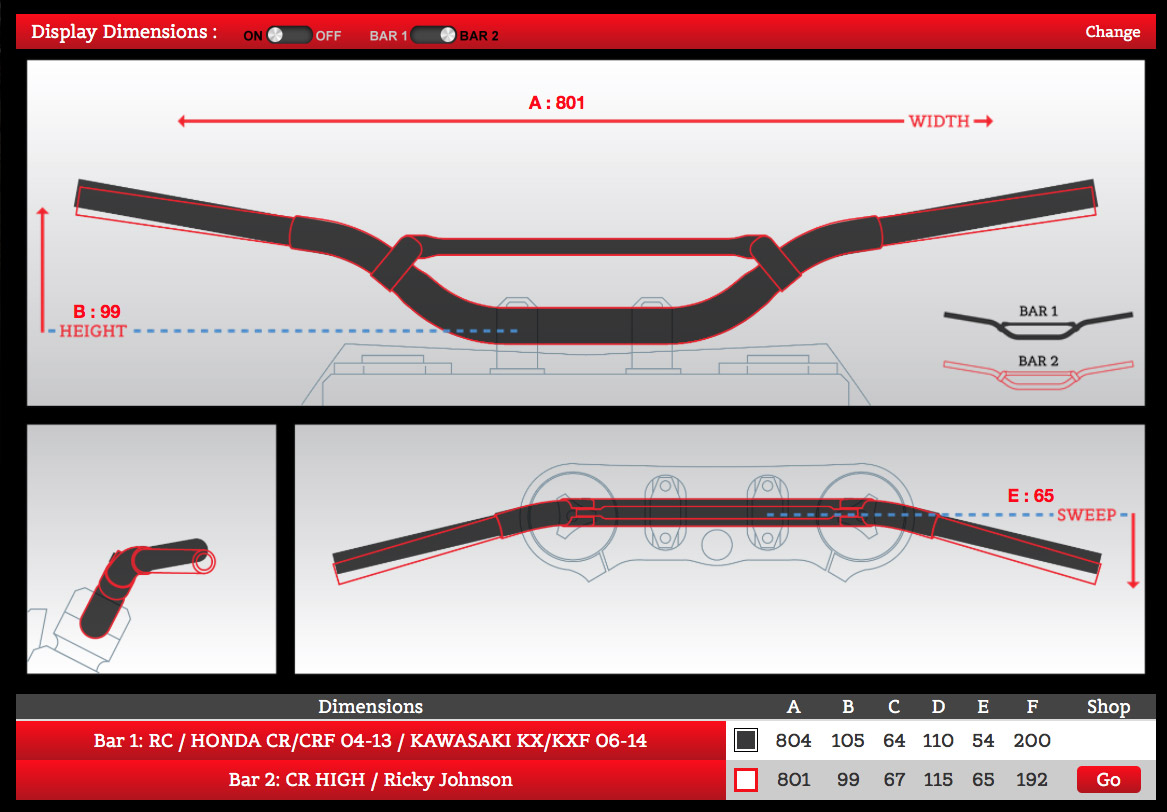
Worksfit™ allows the user to choose their reference handlebar, maybe the OEM bar which came on their specific model, and then choose another bar which they wish to compare it to, and then overlay the two images to see the visual differences in height, sweep, width etc. A complete list of the key dimensions will be shown and the user will get 3 different views to analyze.
Step 1 : Choosing a Reference Bar
To start the process you must first choose a reference bar. This is a handlebar that you should be familiar with, so you have a reference point to relate the difference in the bars to.
You have 4 choices of bars to choose from
- 7/8th Handlebars
- Fatbar
- Twinwall
- OE Bike Handlebars
Simply click on the handlebar row in the table after filtering using the drop down menu to make it appear in the comparison window.
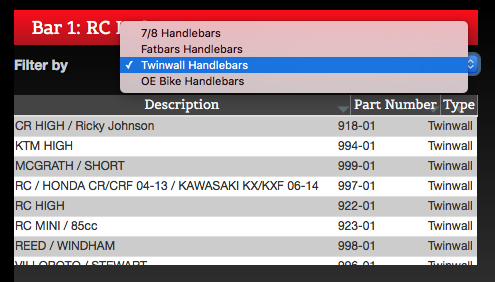
Step 2 : Choosing a Renthal® Bar
After a reference bar has been selected, it’s time to look into the Renthal® range to find the perfect handlebar to compare.
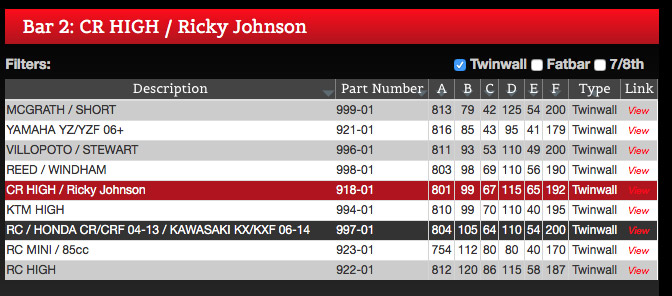
Filter : Usign the tick boxes in the top right, you are able to filter out the types of Renthal™ bars
Organise : The resulting bars can be organiseed by any of the table coloumn headers. Recommended columns are B (Height) and E (Sweep)
Reference : The reference bar is highlighted in gray in the Renthal® table. This helps when filtering for a specific dimension to know whether the bar you are choosing will be higher and lower in the filtered dimension.
Selection : The selected Renthal® handlebar shows with a red highlight. In this example the table has been ordered by the B (height) column.
Simply click on the handlebar row in the table after filtering and organising the table to make appear in the comparison window.
Step 3 : Comparing handlebars
Now the user has chosen 2 handlebars to compare, we can look at the overlaid images to see the subtle differences that give each handlebar it’s own characteristics.
This is a visual inspection of the handlebar graphics.
The 3 views help highlight the height, width and sweep differences between the two bars.
These views provide the rider with an easier to understand comparison than the traditional numerical comparison.
Step 4 : Reviewing the handlebars
At this point we can review the handlebars in greater detail by looking at the key dimensions as well as the additional dimension comparison table.
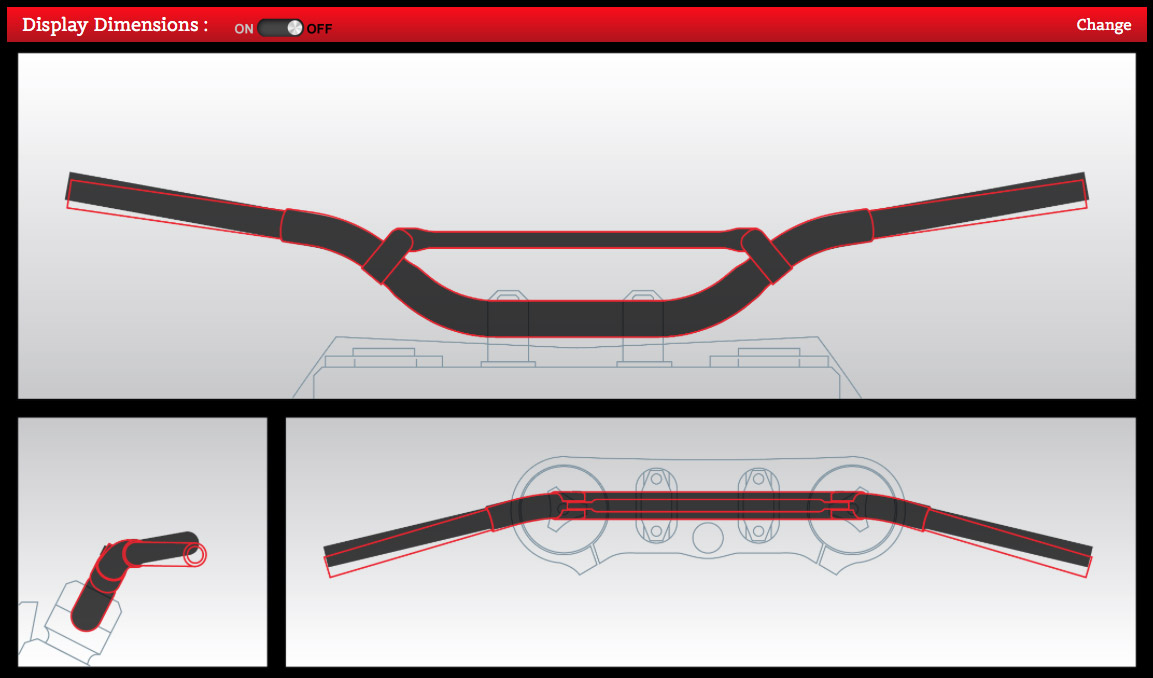
Dimensions can be viewed as additional overlay layer and switch between the two different handlebars using the toggles in the header.
Should you find the Renthal® bar you’ve selected is not correct, simple return to the Renthal® handlebar selection and select another.